Your Huck, Salinero or Totilas is happily trotting along, until one day....
We all know the horror of the sound of a model horse hitting the floor. Sometimes it's preceded by the dreaded sound of dominos as he takes all of his friends with him.
It's not his fault, it's that dang plastic disc base Breyer provides for them. They're thin, lightweight, and prone to cracking with the weight of a model over time. Eventually, they shatter and down goes your horse. Basically, they're a ticking time bomb... Save your ponies!
Below: Original Breyer plastic disc base showing spiderweb cracks:

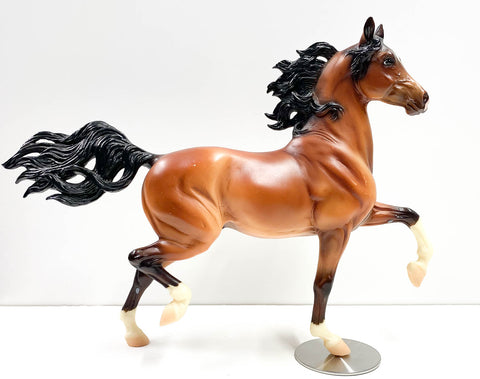
We heard enough horror stories that we hired a local machinist to create solid metal bases to better protect these beautiful molds. Our bases are solid steel, so they won't crack or warp. They weigh almost 3 ounces, so they're heavy enough to provide a good anchor, and their steel peg will keep your horse safely upright while remaining easily removable for transport.
We sell hundreds of them, so we know they work, with collectors often buying one, then coming back for half a dozen more.
Removing Broken Pegs
But what if your horse's old Breyer base has broken, leaving the plastic peg wedged into his poor little hoof? It needs to be removed before he can use a new base. Here's how:
Any work on a foot usually is best done by a two-person team - One "handler" holding the model steady to protect him from damage, while the other does the veterinary work.
If there's a section sticking out of his foot, needle-nose pliers are your easiest option. Not easy, but easiest. We prefer to do this with both people seated facing each other, so you can use your lap to help steady the horse and keep him in position. The "handler" will want to hold the peg-leg tightly, as close to the hoof as possible, so that the "vet" doesn't inadvertently twist the leg and damage it. The "vet" can then try to grasp the peg as close to the hoof as possible and pull upward. It will be a hard pull, and you may have to twist it back and forth as you do, to release some of the friction holding it. That's why your "handler" is so important. You may have to try several times - Those pegs are hard to get hold of and harder to pull, but you should be successful.
If the peg is broken off flush with the bottom of the hoof, or if someone had glued it in (please don't glue bases to your horse - they're harder to fix that way), you're going to need to bring in the heavy equipment. You'll need a piece of masking tape and a drill (or Dremel) with a 3/32" (approx 2.4mm) or smaller drill bit. If you try to drill straight in without using the tape, the bit is likely to slide off the hard plastic of the peg and dig into the foot. Instead, place a piece of masking tape over the hoof so the drill has something to "grip" into. You may want to mark where the center of the peg is, to make sure your aim with the drill is perfect. The idea is not to make the original hole any bigger than it was, so you want to drill right into the center of the stuck peg. Now you can drill into the peg. If it wasn't glued in place, it should break up and fall out.
Some people have good luck using a hot pin instead. They heat the pin (hold it with pliers so you don't get burned), then stick it deep into the peg. They say that sometimes the peg will melt a bit and stick to the pin so you can pull it out. We haven't tried that technique.
If the peg was glued in there, take a deep breath and get ready for real surgery. If you've bought one of our bases ahead of time, you can stand the bit next to the peg on the base and use that to measure how deep to drill. Wrap tape around the bit at that height so that when you drill deeply enough that the tape almost touches his foot, you know you're deep enough. That's important so you don't accidentally go too deep and drill out through the top of his foot!
If you didn't buy one of our bases ahead of time, you'll want to stand the horse up on a table, stand the bit up next to his foot, and try to determine how far you can drill in without going through the top of his foot. Wrap a piece of tape around the bit a little bit lower than that for safety.
Place a piece of masking tape over the bottom of his foot to give the drill something to grab onto so it doesn't slip sideways. Mark the tape where the center of the peg is so you'll know where to drill. Drill into the peg with a 3/32" (approx 2.4mm) or smaller drill to create a leader hole. This will put less stress on the foot when you use the larger bit. Then drill straight into the same spot with a 9/64" (3.5mm) drill bit, being sure you've also taped that bit as well it to guide your depth. That's the size hole you'll need for safely using a steel base.
Your handler will need to help not only keep the horse steady but also insure that the horse is held at the right angle so that you can drill in a way that will be vertical when you're done. A crooked hole will mean a horse that stands crooked, or worse, can't use a base at all, but it's easy to drill it straight if you pay attention.

Correcting Too-Small Holes
If you have an early release model, or if its original peg fit really tightly, it's because Breyer plastic shrinks a bit over time, and that can cause the hole to close up slightly. If you get a steel base and it doesn't fit, it's likely because the hole has tightened up a bit, but don't worry, you can fix it! We recommend enlarging the hole to 5/32" (3.5mm) so that both an original base and a replacement base will fit perfectly. As above, hold the bit up next to the peg on a steel base (or next to the hoof if you don't have a base) and mark the maximum depth you are safe to drill by wrapping tape around the drill above the safe zone. Then slowly drill right into the center of the existing hole. We've had great success with this, and it does NOT negatively affect the value of the model. Actually, it could increase its value, since it can now stand safely.
As long as you go slowly and carefully, you can easily help your horses so they can trot safely along for decades to come!
Correcting Too-Large Holes
What if someone drilled out a peg without reading this article and used a too-large bit? That can result in the horse fitting loosely on the base, making him less stable. But no worries, you can add a sliver of masking tape to our base's peg to help it snugly fit his enlarged hole.
Hooray for safe, happy horses!

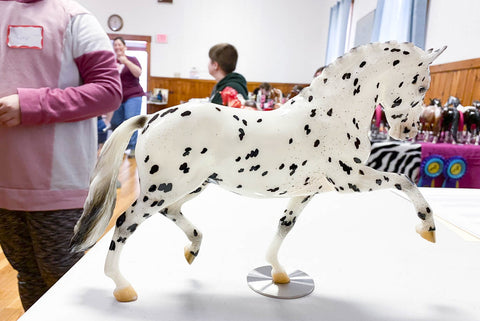
Below: Haley's horse Rialto using his steel base from Triple Mountain at a show: